

Recording a podcast on Zoom has become an increasingly popular choice for podcasters due to its ease of use and flexibility. Whether you’re a seasoned podcaster or a complete beginner, Zoom offers a platform that allows you to connect with guests from anywhere in the world and record high-quality audio. With its built-in recording features, you can start your podcast with minimal equipment, simply requiring a computer with a webcam and microphone.
While Zoom was originally designed for video conferencing, it provides several advantages for podcasting, such as the ability to record separate audio tracks for each speaker. This feature can significantly simplify the editing process and enhance the final production quality of your podcast. Read on to discover how to record a podcast on Zoom and learn some helpful tips to ensure an optimal recording experience.
Setting Up for a Podcast on Zoom

Installing Zoom and Creating an Account
- Install the Zoom app on your device.
- Download Zoom from its official website and follow the installation instructions.
- Open the app and sign up for an account.
- Zoom offers a free basic plan with a 40-minute meeting limit.
- For longer sessions, consider upgrading to the Pro plan ($14.99/month) for up to 24-hour meetings.
- Once your account is set up, you’re ready to start your podcast.
Choosing and Testing Audio Equipment
Sound quality can make or break a podcast, so investing in good audio equipment is crucial. While Zoom allows you to use your device’s built-in microphone and speakers, upgrading to an external microphone will significantly enhance audio quality. Affordable podcasting microphones featuring pop filters to minimize harsh sounds are readily available. Some good practices include testing your microphone before recording to ensure optimal sound capture.
Additionally, wearing headphones during recording can prevent echo feedback, ensuring a clean audio stream. You can select and test your preferred microphone within Zoom’s audio settings under “Select a Microphone,” accessible via the arrow beside the mute button during a meeting.
Optimizing Audio Settings and Features
Once your equipment is ready, it’s time to optimize Zoom’s audio settings for the highest audio quality. Cleaning up potential background noise is vital, particularly if operating in a less-than-ideal recording environment. Initially, make sure to shut off any noise-producing appliances and choose a quiet room for your recording. Next, within Zoom, enable the “Original Sound for Musicians” option.
This feature disables Zoom’s default noise-cancellation technology, which can interfere with the sound quality when high-quality audio equipment is already being used. To enable it, visit the Zoom app settings, click on “Audio,” and select “Show in-meeting option to enable ‘Original Sound.’” Once your session begins, turn on “Original Sound” for a clearer recording.
Recording Process
Scheduling and Starting a Meeting
To schedule a podcast recording session, navigate to the Zoom app and either click on ‘New Meeting’ for an instant session or ‘Schedule’ for a future recording. If scheduling, Zoom integration with Google Calendar can streamline sending invites. Make sure your meeting settings are tailored for recording, including verifying audio and video inputs. When you’re ready, begin the session by clicking ‘Start Meeting.’

Inviting Participants and Managing Audio Tracks
Inviting guests to your podcast is easy via Zoom. During or after scheduling a meeting, use the ‘Invitations’ option to send invites via email or instant messaging. Ensure each participant receives clear instructions, especially if they’re new to Zoom.
In your meeting settings, activate the option to ‘Record a separate audio file for each participant.’ This setting allows each participant’s voice to be captured on different tracks, providing greater control during editing. Access this by navigating to “Settings” from Zoom’s web portal, and under “Recording,” enable the option for separate audio tracks.
Conducting and Recording the Podcast Episode
With everything set up, you’re ready to start recording. Inform your guests at the beginning of the session about the ongoing recording and any other housekeeping details. Once everyone is settled, hit the ‘Record’ button located on the meeting toolbar. For a seamless recording, ensure all video and audio inputs are functioning correctly, and encourage participants to enable ‘Original Sound’ for enhanced clarity.
As you conduct your podcast, keep an eye on indicators for potential internet issues, as stability is vital for maintaining audio quality. If you’re using Zoom’s free plan, remember to monitor the 40-minute cap when planning your session. Upon concluding the episode, you can end the meeting and access your recordings. If you opted for local recording, files should be available on your device soon after. However, for cloud recordings, you can access these through the Zoom portal, often with integration support from tools like Descript for further editing.
Editing and Post-Production
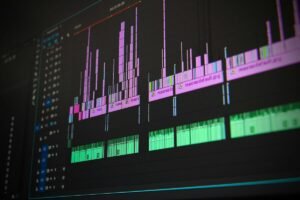
Once you’ve successfully recorded your podcast using Zoom, the next step is editing and post-production. This crucial phase ensures your podcast sounds professional and engaging for listeners. Here, we’ll take you through various aspects of editing and post-production, including handling separate audio tracks, enhancing audio quality, and adding additional content like intros and outros.
Handling Separate Audio Tracks for Editing
One of the significant advantages of recording your podcast on Zoom is the ability to have separate audio tracks for each participant. This feature simplifies the editing process significantly. By isolating each participant’s audio, you can independently adjust volumes, eliminate unnecessary noises, and improve the overall clarity of each speaker.
1. Separating Audio Tracks
- Navigate to your Zoom settings and ensure the option to record separate audio files for each participant is enabled. This should be checked in the ‘Recording’ tab.
- After recording, you’ll find these tracks stored in a folder named “Audio Record.” Each track will be labeled with the participant’s name, making it easy to identify and organize for editing.
2. Editing with Precision
Use audio editing software such as Audacity, Descript, or Adobe Audition to make precise edits. Import the audio files, where you can mute background noise on one track without affecting others or boost the quieter voices individually.
3. Synchronization
Ensure that all tracks are synchronized correctly. Most audio-editing software will automatically align the tracks based on timestamps, but it’s worth checking to avoid any overlaps or timing issues.
Enhancing Audio Quality and Removing Background Noise
Enhancing audio quality is a paramount step in ensuring your podcast is pleasant to listen to. Here are some techniques to achieve high-quality audio:
1. Noise Reduction
Use noise cancellation software, like Krisp or built-in editing tools within software like Descript, to filter out background noise. This can include removing hums from electrical devices, traffic noise, or any ambient sound that might distract listeners from the content of your podcast.
2. Equalization and Compression
Apply equalization (EQ) to balance the frequency levels of your tracks, ensuring voices sound clear and natural. Compression can also be used to equalize volume levels so no parts are too loud or too quiet.
3. Original Sound Feature
When using Zoom, enable the “Original Sound” feature to capture high-fidelity audio. This setting is preferable when using high-quality microphones, as it bypasses Zoom’s default audio processing.
Adding Intros, Outros, and Additional Content
To create a complete and professional-sounding podcast episode, consider adding extra elements such as intros, outros, guest introductions, and additional sound effects or music.
1. Crafting Intros and Outros
Record a short introduction and conclusion for your podcast. This could include the episode title, theme, and any pertinent information about your guest or topic. Use music to make these segments inviting. Sites offering royalty-free music, like Bensound or AudioJungle, can be a resourceful option.
2. Inserting Sound Effects
Add relevant sound effects or transitional music between segments to maintain listener engagement and highlight important parts of the discussion.
3. Narration and Voiceovers
Consider recording additional narration or voiceovers to give context or tie together sections of your podcast. This can help guide listeners through the content and provide additional insights or commentary.
Pros and Cons of Recording Podcasts on Zoom
While Zoom is a popular tool for podcast recording, it comes with its set of advantages and disadvantages that podcasters should weigh before choosing it as their primary recording tool.
Pros
- Ease of Use
Zoom is user-friendly, facilitating easy setup and operation for both hosts and guests. Participants can join merely by clicking a link, with no need to download software.
- Remote Recording
Zoom enables remote interviews, allowing you to host guests from any part of the world without logistical barriers.
- Familiarity
Many users are already familiar with Zoom, minimizing learning curves and technical issues.
- Cost-Effective
The platform offers a free plan, making it accessible for beginner podcasters without requiring investment in specialized recording software.
Cons
- Internet Dependency
Zoom requires a stable internet connection. Poor connectivity can lead to degraded audio and video quality, affecting the final output.
- Compressed Audio Quality
By default, Zoom compresses audio to optimize for conferencing, potentially reducing the quality needed for broadcast-standard podcasts.
- Limited Recording Time on Free Plan
The free version limits recordings to 40 minutes, which may not be suitable for longer podcast episodes.
- Lack of Direct Publishing Options
Zoom does not offer built-in capabilities for publishing podcasts to platforms like Spotify or Apple Podcasts, necessitating additional steps.
Conclusion
Recording a podcast on Zoom is an accessible and efficient way to create content, especially for beginners. Its user-friendly interface and ability to host remote interviews make it an attractive option for podcasters. However, while Zoom offers convenience and essential features like multi-track recording and integration with superior editing tools like Descript, it does have some limitations in audio and video quality due to compression and reliance on internet stability.
For those just starting out, Zoom is a great tool to get your podcasting journey underway. Yet, as your podcast grows, you might find yourself exploring other dedicated podcasting platforms like SquadCast or Riverside.fm, which provide higher-quality recording capabilities. Whatever tool you choose, remember that preparation, the right equipment, and post-production editing are key to delivering a professional podcasting experience. Whether you stick with Zoom or explore alternatives, happy podcasting!